
How to Turn a Lightroom Preset into a DaVinci Resolve LUT
- Maxwell Thomason
- Apr 17
- 6 min read

How to Turn a Lightroom Preset into a DaVinci Resolve LUT
TL;DR: DaVinci Resolve now has a dedicated photo editor. Your Lightroom presets can make the jump as .cube LUT files. The full conversion workflow uses free tools and takes about five minutes per preset. Or you can automate it entirely with PassXMP.
DaVinci Resolve just shipped a Photo page. The same node-based color engine that grades major films and streaming shows is now available for still photography. Full RAW support. AI masking. Node-based editing at full resolution. And the base version is completely free.
For photographers coming from Lightroom, this changes the math. No subscription. Hollywood-grade color science. A color pipeline that makes Lightroom's slider stack look like training wheels.
But the first question everyone asks is the same: what happens to my presets?
You've spent years building a preset library. Your color language lives in those files. Every client look, every personal style, every creative decision you've refined over hundreds of shoots. The idea of starting over from scratch is a dealbreaker.
Good news: you don't have to. Your Lightroom presets can be converted into .cube LUT files that DaVinci reads natively. The process is straightforward, the tools are free, and the color fidelity is high. Here's the full workflow.
What Carries Over (and What Doesn't)
A .cube LUT encodes global color transforms. These are operations that apply uniformly to every pixel based on its input color value. If the operation only cares about what color a pixel is, it transfers. If it cares about where the pixel is, what's around it, or how bright the overall scene is, it doesn't.
What Transfers
White Balance (Temperature and Tint)
HSL sliders (Hue, Saturation, Luminance)
Tone Curve (parametric and RGB point curves)
Color Grading Wheels (shadows, midtones, highlights)
Vibrance and Saturation
Split Toning (legacy presets)
What Stays Behind
Exposure, Contrast, Whites, Blacks, Highlights, Shadows
Clarity, Texture, Dehaze
Sharpening and Noise Reduction
All masks (radial, linear, brush, AI subject/sky/object)
Lens Corrections and Transform
The adjustments that don't transfer are the ones you'd rebuild differently in DaVinci anyway. Resolve's node system gives you more granular control over contrast, clarity, and exposure than Lightroom's slider stack ever could. The LUT gets you about 85% of your look. The remaining 15% you rebuild with nodes, and it'll be better than what you had.
Stage 1: Prepare Your Preset in Lightroom
Before you convert anything, create a LUT-safe version of your preset. This means stripping out everything a LUT can't encode, leaving only the pure color transform.
Step 1: Open Lightroom Classic, Develop module. Apply your preset to any image. The image content doesn't matter. You're using it as a workspace.
Step 2: Zero out everything that can't transfer. Set Exposure, Contrast, Highlights, Shadows, Whites, and Blacks all to zero. Set Texture, Clarity, and Dehaze to zero.
Step 3: Remove all masks. Radial filters, graduated filters, brush adjustments, AI masks. Delete them entirely.
Step 4: Verify what's left. Your White Balance, HSL sliders, Tone Curve, Color Grading wheels, Vibrance, and Saturation should still be intact. These are your color identity.
Step 5: Save as a new preset with [LUT] in the name (e.g., "Warm Film [LUT]"). This keeps your original preset untouched.
Stage 2: Convert Your Lightroom Preset to a .cube LUT
This is the clever part. Instead of trying to parse Lightroom's .xmp file format (which is complex and undocumented), you use a mathematical identity image to capture the color transform directly.
What is a Hald CLUT?
A Hald CLUT is a special image where every possible RGB color value is mapped to a specific pixel position. Think of it as a lookup table in image form. When you apply a color transform to this image, every shifted pixel encodes exactly what your preset does to that specific color. The entire color transform is captured as pixel data.
Download a Hald CLUT identity image (Level 12 or higher recommended for quality). These are freely available online.

Apply Your Preset to the Hald
Import the Hald CLUT image into Lightroom. Apply your [LUT] preset to it. The image will look like a shifted rainbow grid. That's correct. The color shifts are the data.
Export the Processed Hald
Export from Lightroom with these exact settings:
Format: PNG
Color Space: sRGB
Bit Depth: 8 bit
Sharpening: None
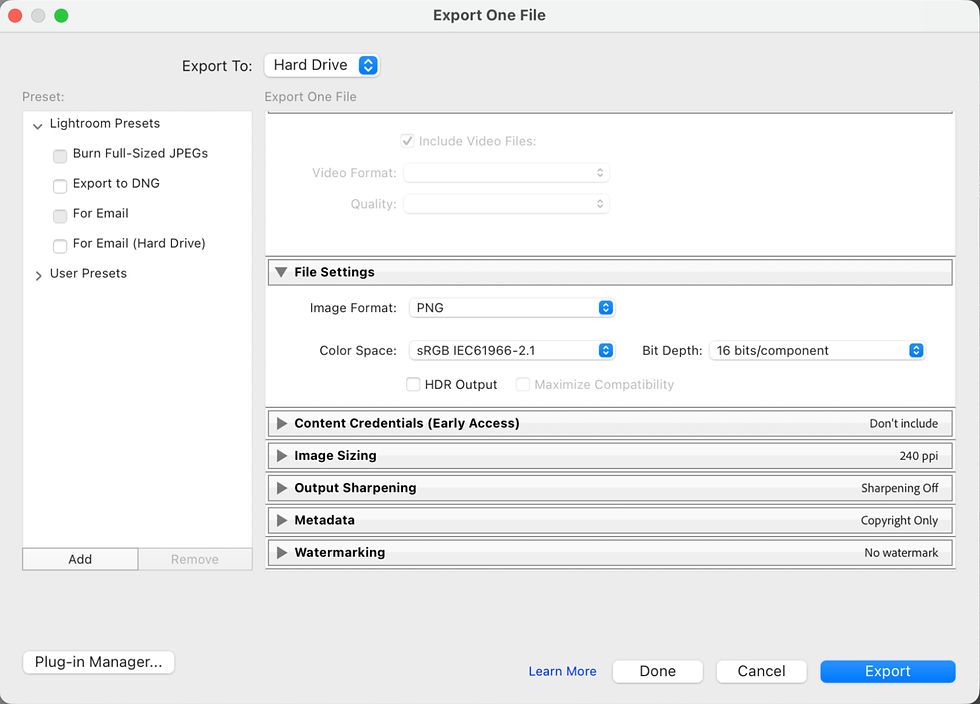
The pixel color data is what matters. Resolution, DPI, and sharpening are irrelevant and could introduce artifacts.
Generate the .cube File
Open IWLTBAP LUT Generator (free tool). Click "Convert to CUBE" and select your exported Hald PNG. The tool reads the pixel data, compares it against the known identity values, and writes a standard .cube LUT file. One click. The conversion is instant.

Stage 3: Use in DaVinci Resolve
Install the LUT
Copy your .cube file to DaVinci's LUT directory:
Mac: /Library/Application Support/Blackmagic Design/DaVinci Resolve/LUT/
Windows: C:\ProgramData\Blackmagic Design\DaVinci Resolve\Support\LUT\
Create a subfolder (e.g., "My Lightroom LUTs") to stay organized. DaVinci reads this directory on launch. Restart Resolve if it's already open.
Open the Photo Page
DaVinci Resolve's Photo page is built for still image editing. Open Resolve, switch to the Photo tab in the bottom toolbar. Import your image. This is where your .cube LUT comes to life with a full node-based color pipeline built for stills.
Apply the LUT
Right-click in the node editor. Select LUT from the context menu. Browse to your .cube file. Your Lightroom color grade is now live on the image.
From here, add more nodes to rebuild the non-color adjustments. Contrast, clarity, exposure, each gets its own node. Much more control than Lightroom's stacked slider approach.
Expect to Tweak
The LUT gets you about 85% of your Lightroom look. The missing 15% is contrast, clarity, and exposure. You rebuild those with Resolve's node system.
This is actually the upgrade. Each adjustment lives on its own node. You can reorder them, bypass them individually, copy them between images, and build correction chains that Lightroom's linear slider stack could never handle. The 15% you rebuild will be better than what you had.
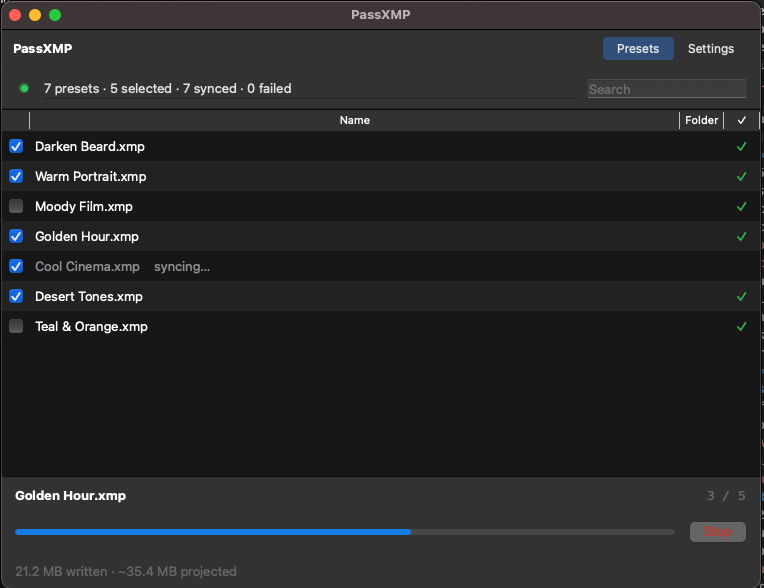
Automate It: PassXMP
The manual workflow above is great for understanding the process. But if you're moving an entire preset library, doing this one preset at a time gets old fast.
I built PassXMP to solve exactly that. It's an open-source tool that watches your Lightroom presets folder and automatically mirrors your entire library into DaVinci as .cube LUT files.
Same folder structure. Your organization carries over exactly.
Same names. Warm Film.xmp becomes Warm Film.cube.
Live sync. Create a preset in Lightroom, it appears in DaVinci. Delete one, it's gone. Move it to a new folder, it moves in DaVinci too.
Automatic sanitization. PassXMP strips the non-color adjustments before conversion. No need to create [LUT] variants manually.
One-time setup. Install, confirm your folders (PassXMP auto-detects both), hit Start. Done forever.
Free. Open source. Mac + Windows. I built this because I needed it for my own workflow and figured other photographers making the switch would too.
Key Takeaways
DaVinci Resolve's Photo page brings Hollywood-grade color grading to stills, and the base version is free
Lightroom presets (.xmp) can be converted to DaVinci LUTs (.cube) with high color fidelity
The conversion uses a Hald CLUT identity image, not direct file parsing
Global color transforms (HSL, curves, white balance, color grading) transfer cleanly
Spatial and tonal adjustments (exposure, contrast, clarity, masks) need to be rebuilt with nodes
The LUT gets you 85% of your look. The 15% you rebuild with nodes will be better
PassXMP automates the entire process for your full preset library
Helpful Links
PassXMP on GitHub - Automatic Lightroom preset to DaVinci LUT sync
IWLTBAP LUT Generator - Free Hald PNG to .cube conversion tool
DaVinci Resolve Download - Free version includes the Photo page
Frequently Asked Questions
Does the LUT match my Lightroom preset exactly?
About 85%. The color transforms (HSL, curves, white balance, color grading wheels) match with high fidelity. Tonal adjustments like exposure, contrast, and clarity need to be rebuilt in Resolve's node system. Most photographers find the node rebuild gives them more control than the original Lightroom sliders.
Does this work with the free version of DaVinci Resolve?
Yes. The Photo page and LUT application are both available in the free version of DaVinci Resolve. No Studio license required.
Can I batch convert multiple Lightroom presets at once?
The manual Hald CLUT workflow is one preset at a time. For batch conversion of your entire library, PassXMP handles it automatically. It converts every preset on first run and keeps them synced going forward.
What about Lightroom CC (cloud) presets?
This workflow is for Lightroom Classic, which stores presets as .xmp files on disk. Lightroom CC stores presets in Adobe's cloud. You would need to export them to .xmp first before converting.
Conclusion
The gap between Lightroom and DaVinci Resolve used to be a wall. Your presets lived in one ecosystem and there was no bridge to the other. That's no longer true.
The manual workflow takes five minutes per preset. PassXMP handles your entire library automatically. Either way, your color language doesn't have to stay locked in Lightroom. DaVinci's Photo page is the most powerful still-image color grading tool available to photographers right now, and it costs nothing.
Looking for professional concert photography in Dallas? View my concert photography services to learn more about booking.


Comments